
- 1. Understanding AC Condenser Coils
- 2. Signs of a Faulty AC Condenser Coil
- 3. Tools Required for Replacing the AC Condenser Coil
- 4. Step-by-Step Guide to Replacing the Condenser Coil
- 5. When to Call a Professional for AC Coil Issues
- 6. Real-Life Case Study: Replacing an AC Condenser Coil
1. Understanding AC Condenser Coils
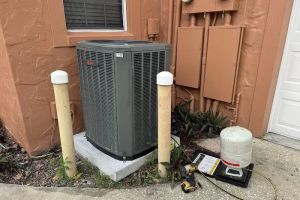
The AC condenser coil is a crucial component of your air conditioning system. It is located in the outdoor unit and is responsible for releasing the heat absorbed from inside your home to the outside air. The condenser coil works in conjunction with other parts of the HVAC system to regulate your home’s temperature and ensure efficient cooling.
The coil is typically made of copper or aluminum, with metal fins designed to increase the surface area for better heat dissipation. Over time, the condenser coil can become dirty, damaged, or worn out, leading to performance issues with your air conditioning system.
2. Signs of a Faulty AC Condenser Coil
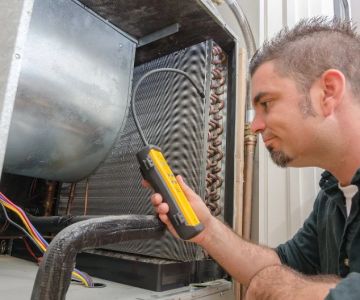
A malfunctioning condenser coil can cause a variety of issues with your air conditioning system. It’s essential to identify these signs early so you can address the problem before it leads to a complete system failure. Here are some common indicators of a faulty AC condenser coil:
1. Reduced Cooling Efficiency: If your AC is running but not cooling the air as effectively as it used to, the condenser coil may be partially blocked or damaged. Insufficient heat exchange can prevent the system from cooling properly.
2. Unusual Noises: A hissing or gurgling noise coming from the outdoor unit could indicate a refrigerant leak, which often stems from a damaged condenser coil. A buzzing or rattling sound may also indicate debris stuck in the coil or mechanical issues with the system.
3. Frozen Coil: A dirty or damaged condenser coil can lead to ice buildup, as the system fails to release heat properly. If you notice ice forming around the coil, it’s a clear sign that something is wrong with the condenser coil or the system’s airflow.
4. Increased Energy Bills: A faulty condenser coil can reduce the overall efficiency of your AC system, leading to higher energy consumption. If you notice a spike in your electricity bills without a significant increase in cooling demands, it may be time to inspect the condenser coil.
3. Tools Required for Replacing the AC Condenser Coil
Replacing a faulty AC condenser coil requires the right tools and equipment. Here’s a list of the essential items you’ll need to carry out the replacement:
1. Screwdriver: A screwdriver set (both Phillips and flathead) will be needed to remove screws from the outer panels of the AC unit.
2. Wrench Set: Wrenches are required to disconnect the refrigerant lines from the coil. Be sure to have the correct size wrenches for the job.
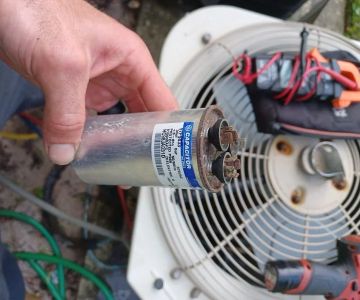
3. Refrigerant Recovery System: Since working with refrigerants can be dangerous and regulated, a refrigerant recovery system is essential to safely remove and store the refrigerant from your AC unit.
4. Replacement Coil: You’ll need a new condenser coil that is compatible with your AC unit. It’s essential to match the size and specifications of the old coil to ensure proper functionality.
5. Gloves and Safety Gear: Always wear gloves and other safety gear when working with the AC system, as parts can be sharp, and refrigerants can be harmful if not handled properly.
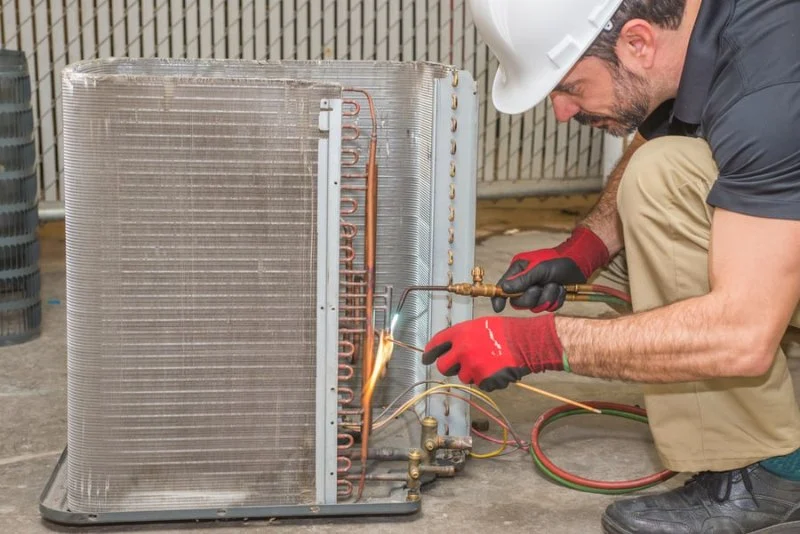
4. Step-by-Step Guide to Replacing the Condenser Coil
Follow these steps to replace your faulty AC condenser coil:
1. Turn Off the Power: Before starting any work on the AC unit, ensure that the power is completely turned off to avoid electrical hazards. Switch off the breaker that controls the AC unit.
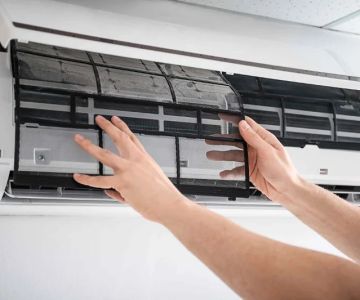
2. Remove the Outer Panels: Use a screwdriver to remove the panels surrounding the condenser coil. Take your time to carefully remove any screws to access the coil.
3. Disconnect the Refrigerant Lines: Using the appropriate wrenches, disconnect the refrigerant lines from the faulty condenser coil. This step may require a refrigerant recovery system, as the refrigerant must be safely removed.
4. Remove the Old Coil: Once the refrigerant lines are disconnected, carefully remove the old condenser coil from the unit. You may need to remove additional screws or brackets that are securing the coil in place.
5. Install the New Coil: Position the new condenser coil in the same place as the old one. Ensure it is securely fastened with screws and brackets, and reconnect the refrigerant lines to the coil.
6. Refill Refrigerant: Once the new coil is in place, refill the refrigerant lines with the appropriate type and amount of refrigerant for your system. Ensure you follow manufacturer guidelines and use a refrigerant recovery system if necessary.
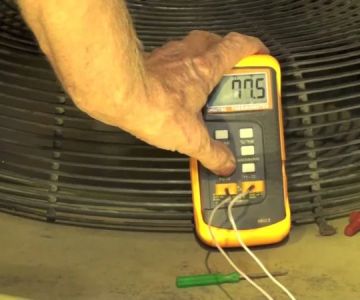
7. Test the System: After the replacement is complete, turn the power back on and test the system to ensure it’s operating correctly. Monitor the cooling performance and check for any unusual sounds or issues.
5. When to Call a Professional for AC Coil Issues
While replacing a condenser coil is something you can do on your own if you have the right tools and knowledge, there are times when it’s best to call a professional. Consider reaching out to an HVAC technician if:
1. You’re unsure about handling refrigerant: Refrigerant is toxic and can cause harm if mishandled. If you're not confident in safely removing and refilling refrigerant, it's best to call in a professional.
2. You lack the necessary tools: Some tasks, such as refrigerant recovery, require specialized equipment that may not be available to the average DIYer. A professional will have the tools and experience needed to get the job done safely and effectively.
3. You encounter issues beyond the condenser coil: If your AC system is still malfunctioning after replacing the coil, or if you notice other signs of damage, it’s a good idea to have a professional inspect your system for any underlying issues.
6. Real-Life Case Study: Replacing an AC Condenser Coil
Mark, a homeowner from Florida, faced a situation where his AC stopped cooling properly during the summer. After investigating, he identified that his condenser coil was clogged with dirt and debris. He followed a detailed guide to replace the coil himself, but he encountered some difficulties in handling the refrigerant safely.
Mark shares, “I was able to replace the coil, but when it came time to handle the refrigerant, I wasn’t sure if I was doing it right. I ended up calling a technician to help me recharge the system. Once that was done, my AC was working like new again.” Mark’s story emphasizes the importance of knowing when to seek professional help, especially when dealing with refrigerants.
If you're planning to replace your AC condenser coil, or if you're unsure about any part of the process, be sure to consult with experts and get the right tools. Visit Ac Fix for top-quality products and services to help you maintain and repair your AC system efficiently.


 Scenic City Heating and AC4.0 (403 reviews)
 Moore's Electrical & Mechanical5.0 (3 reviews)
 Edwards Heating & AC4.0 (3 reviews)
 Cadco Heating & Cooling Inc.4.0 (40 reviews)
 LIFETIME AIR, LLC4.0 (691 reviews)
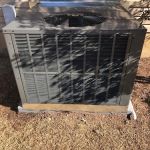 B & W Heating & Air Inc4.0 (22 reviews)
 How to Troubleshoot an Air Conditioner That Isn’t Turning On or Off
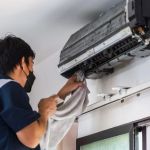 How Much Does It Really Cost to Fix an Air Conditioning Leak?
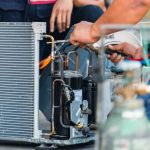 How to Deal with Air Conditioner Condenser Problems and Fix Them
 What to Do When You Need Someone Who Can Fix My AC Immediately
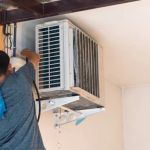 Fastest Way to Get My AC Fixed Without Getting Overcharged
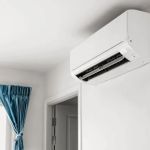 Affordable Companies That Fix Wall Air Conditioners Near You – Top Options