
- 1. Understanding the Role of an AC Capacitor
- 2. Signs of a Faulty Air Conditioner Capacitor
- 3. Tools You’ll Need for Capacitor Replacement
- 4. How to Safely Disconnect and Replace the Capacitor
- 5. Testing and Troubleshooting After the Replacement
- 6. When to Call a Professional for AC Repair
1. Understanding the Role of an AC Capacitor
The air conditioner capacitor is a crucial component that helps your AC system start and run efficiently. It stores energy and releases it when needed to power the compressor and fan motors. A faulty capacitor can cause your air conditioner to malfunction, leading to higher energy consumption or complete system failure. Understanding its role is essential for troubleshooting and repairs.
2. Signs of a Faulty Air Conditioner Capacitor
A faulty AC capacitor can show several signs, including the AC failing to start, unusual humming noises, or the system shutting down after a few minutes. Other symptoms include weak airflow, the compressor not running, or the air conditioner tripping circuit breakers. If you notice any of these signs, it may be time to check and replace the capacitor.

3. Tools You’ll Need for Capacitor Replacement
Before you begin replacing your AC capacitor, gather the necessary tools. You’ll need a multimeter to test the capacitor’s condition, insulated screwdrivers for safe handling, a socket wrench to remove the capacitor, and a pair of safety gloves. Additionally, you may need a capacitor puller or pliers to remove the capacitor safely from its housing.
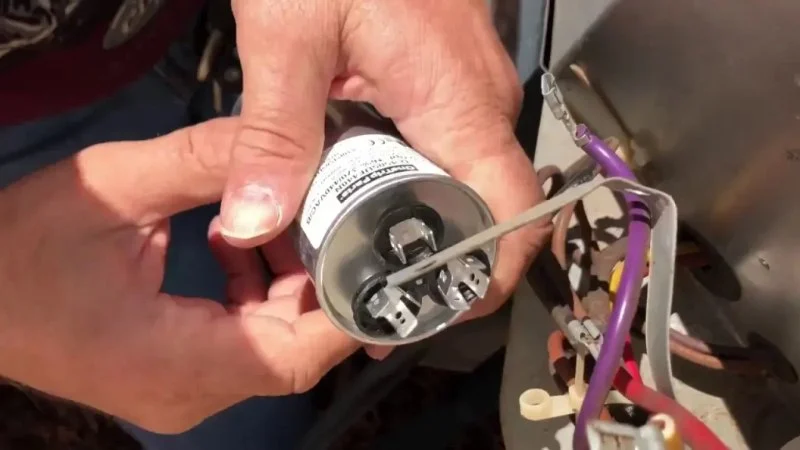
4. How to Safely Disconnect and Replace the Capacitor
To replace the capacitor, first, ensure your air conditioner is turned off and unplugged. Locate the capacitor—typically found near the AC unit’s control board—and discharge any stored electricity by using an insulated screwdriver to short the terminals. Carefully remove the faulty capacitor and install the new one, ensuring it matches the correct voltage and capacitance specifications. Secure the new capacitor, reconnect all wires, and reassemble the AC unit.
5. Testing and Troubleshooting After the Replacement
Once the new capacitor is installed, it’s essential to test the AC system to ensure the repair was successful. Turn the system back on and observe if the air conditioner starts smoothly and runs as expected. If you still experience issues, recheck the wiring connections, capacitor specifications, and any other underlying problems like the fan motor or compressor.
6. When to Call a Professional for AC Repair
If you're not comfortable performing the replacement yourself, or if the issue persists after replacing the capacitor, it’s best to call a professional technician. A certified technician can ensure that your air conditioner is properly repaired and diagnose any underlying issues that might be affecting the capacitor or other components.

 Comfort Control Air Conditioning & Heating5.0 (7 reviews)
 Air-Tech Heating & Air Conditioning4.0 (21 reviews)
 Cooling Wizards Heating and Air Conditioning5.0 (5 reviews)
 Alabama Industrial Services Co5.0 (1 reviews)
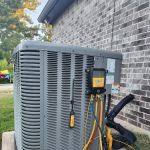 Houston Admiral Air4.0 (539 reviews)
 The Thornburg Project5.0 (9 reviews)
 How to Diagnose and Repair Common AC Cooling Issues
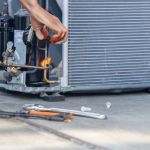 Top Ways to Fix AC Condenser Quickly and Affordably in Your Area
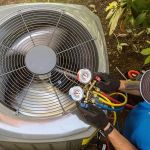 How to Repair an Air Conditioner That’s Running Too Much
 Air Conditioner Troubleshooting: Fixing Low Airflow and Blocked Vents
 What to Do When You Need to Fix My AC Immediately
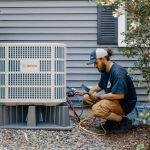 How to Diagnose and Fix Your AC Immediately | Quick Solutions for AC Problems