
- 1 - Why Replace Your Thermostat?
- 2 - Signs That Your Thermostat Needs Replacing
- 3 - Choosing the Right Thermostat for Your AC System
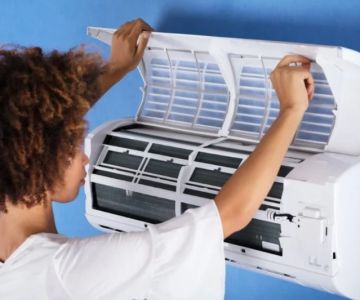
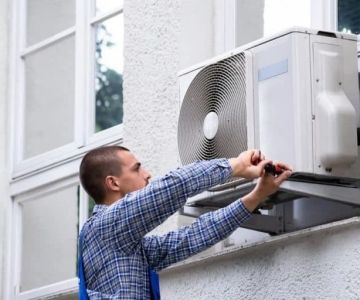
- 4 - How to Replace Your Thermostat: Step-by-Step Guide
- 5 - Common Mistakes to Avoid When Replacing Your Thermostat
- 6 - Why Choose AC Fix for Your Thermostat and AC System Needs
1. Why Replace Your Thermostat?
Your thermostat plays a vital role in controlling your home’s air conditioning system. It regulates the temperature, ensuring your home stays comfortable during hot weather. However, over time, thermostats can wear out, become less accurate, or develop faults that cause your AC system to operate inefficiently. Replacing your thermostat can restore your system’s efficiency, improve temperature regulation, and reduce energy bills.
If your thermostat is old, malfunctioning, or causing your AC to behave erratically, replacing it is a cost-effective solution that can lead to long-term savings and comfort. A new, properly calibrated thermostat can optimize your system’s performance, making it a worthwhile investment for both convenience and energy efficiency.

Master-Tech Automotive for all your automotive needs !
170 Bunton Creek Rd, Kyle, TX 78640, USA
2. Signs That Your Thermostat Needs Replacing
Before replacing your thermostat, it's important to know the signs that indicate it’s time for a replacement. Here are some common symptoms that suggest your thermostat might need to be replaced:

Hiller Plumbing, Heating, Cooling & Electrical
MurfreesboroRutherford CountyTennessee
241 Southpointe Way, Murfreesboro, TN 37130, USA
1. Inaccurate Temperature Readings
If your thermostat consistently displays incorrect temperatures or doesn’t seem to match the room’s actual temperature, it might be faulty. This can lead to uncomfortable conditions and cause your AC to overwork, leading to higher energy consumption.
2. AC System Is Not Responding
If your AC system doesn’t respond to the thermostat’s settings or the temperature remains inconsistent despite adjustments, your thermostat may not be sending the right signals to your HVAC system. This is a clear sign that it’s time to replace the thermostat.
3. Short Cycling
Short cycling occurs when your AC turns on and off frequently, causing inefficiency and strain on the system. A malfunctioning thermostat can cause short cycling by sending erratic signals to the AC unit.
4. Old Thermostat Model
If your thermostat is outdated, it may not be equipped with modern features such as programmable settings, smart controls, or Wi-Fi connectivity. Replacing it with a newer model can improve your system’s functionality and energy efficiency.
3. Choosing the Right Thermostat for Your AC System
Choosing the right thermostat for your air conditioning system is crucial to ensuring efficient operation and convenience. Here are some factors to consider when selecting a new thermostat:
1. Compatibility with Your AC System
Not all thermostats are compatible with all AC systems. Before purchasing a new thermostat, ensure it works with your particular type of air conditioning system, whether it’s central air, a heat pump, or a split system. Check the thermostat’s specifications to make sure it matches your system’s wiring and functions.
2. Programmable vs. Non-Programmable
Programmable thermostats allow you to set schedules for temperature adjustments throughout the day, helping you save on energy costs by cooling your home only when needed. Non-programmable thermostats, on the other hand, are simpler and offer manual control. Choose a model based on your preference for convenience versus simplicity.
3. Smart Thermostats
If you’re looking for advanced features, consider investing in a smart thermostat. These thermostats allow you to control your AC remotely via smartphone or voice commands and can learn your preferences over time, optimizing energy efficiency. Many smart thermostats also integrate with home automation systems, offering even more convenience and control.
4. Easy-to-Read Display
When choosing a thermostat, look for one with a clear, easy-to-read display. Digital displays are often easier to read than analog ones, and many models include backlighting for use in low-light conditions.
4. How to Replace Your Thermostat: Step-by-Step Guide
Replacing a thermostat can be a straightforward DIY task if you follow the right steps. Here’s a step-by-step guide to help you replace your thermostat:
1. Turn Off Power to Your HVAC System
Before you begin, turn off the power to your HVAC system by switching off the circuit breaker. This will prevent electrical shock and ensure safety during the replacement process.
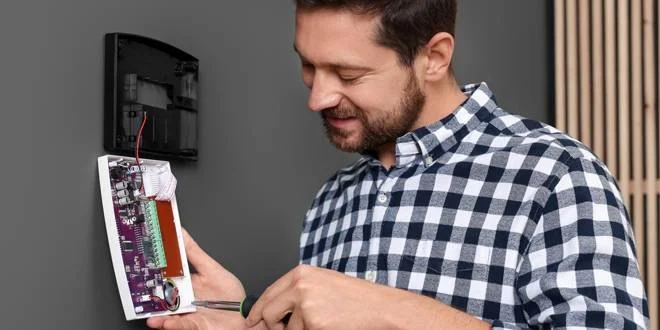
2. Remove the Old Thermostat
Use a screwdriver to remove the cover of your old thermostat. Take note of how the wires are connected to the old unit, as you will need to replicate this connection with the new thermostat. If needed, take a photo of the wiring setup for reference.
3. Install the New Thermostat Base
Once the old thermostat is removed, install the new thermostat’s base according to the manufacturer’s instructions. Use the screws provided to attach the base to the wall, ensuring it is level and securely mounted.
4. Connect the Wires
Carefully connect the wires to the corresponding terminals on the new thermostat. Ensure the wires are tightly secured and that each wire is connected to the correct terminal. If you’re using a programmable or smart thermostat, follow the instructions to set it up accordingly.
5. Attach the Thermostat Cover
Once the wires are connected, attach the cover of the new thermostat. Make sure it is securely fastened and properly aligned with the base.
6. Test the New Thermostat
Turn the power back on and test the new thermostat to ensure it is working correctly. Set the desired temperature and check if the AC responds appropriately. Adjust the settings to verify proper functionality.
5. Common Mistakes to Avoid When Replacing Your Thermostat
When replacing your thermostat, be sure to avoid these common mistakes to ensure a smooth and successful installation:
1. Incorrect Wiring
Incorrectly wiring the thermostat can cause malfunctioning or damage to your HVAC system. Double-check the wiring diagram before connecting the wires, and use a photo of the old setup for reference.
2. Forgetting to Turn Off the Power
Always turn off the power to the HVAC system before replacing the thermostat. Forgetting this step can result in electric shock or damage to the system.
3. Choosing the Wrong Thermostat Model
Ensure that the thermostat you choose is compatible with your HVAC system. Double-check the specifications of the new thermostat to avoid installation issues.
6. Why Choose AC Fix for Your Thermostat and AC System Needs
At AC Fix, we offer a wide range of high-quality thermostats, as well as expert advice on selecting and installing the perfect model for your air conditioning system. Whether you need a traditional or smart thermostat, our team is ready to guide you through the replacement process. Visit AC Fix to find the best thermostats and tools for your HVAC system today!
 Bolton Services Of WNC, Inc.4.0 (585 reviews)
 Precision AirCare LLC5.0 (6 reviews)
 Goodner5.0 (7 reviews)
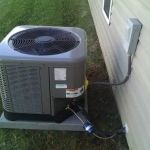 Hall's Heating and Air LLC4.0 (32 reviews)
 EFG Residential Services4.0 (152 reviews)
 Advanced Air Care Heating and Cooling4.0 (164 reviews)
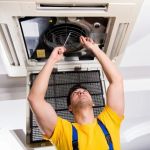 How to Fix an Air Conditioner That Won’t Cool Your Room
 Immediate Steps to Fix Air Conditioning When It Breaks Down
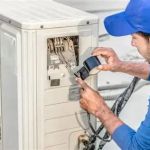 Who Can Fix My AC? Find Out Everything You Need to Know
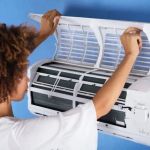 Pros and Cons of Fixing Your Wall Air Conditioner on Your Own
 Best Practices for a Successful and Affordable AC Fix
 Avoid These Costly Mistakes When Trying to Fix Central Air Conditioning Unit